Today I am Providing the way to run PowerShell scripts using Windows Scheduler.
Windows Task Scheduler allows you to schedule PowerShell scripts to accomplish a wide variety of commands on the scheduled time that best fits your needs.

Now you script will run on you selected time or on given interval.
Windows Task Scheduler allows you to schedule PowerShell scripts to accomplish a wide variety of commands on the scheduled time that best fits your needs.
1.
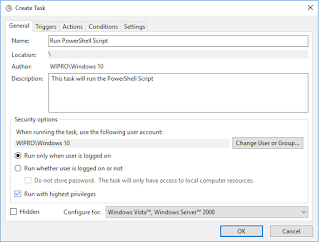
Open
Task Scheduler and create a new task. Give it a Name and set your security
options as per your requiredments. Check "Run with highest
privileges" as our most scripts need to run as admin. If you want
this script to run without logging in to system, enable the 'Run whether user
is logged on or not' radio button.

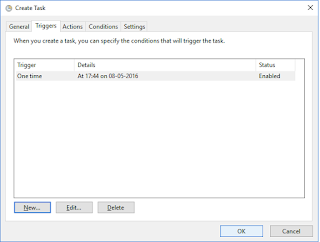
2.
Click
on the Triggers tab and set your schedule or event that will trigger the
running of your PowerShell
script.

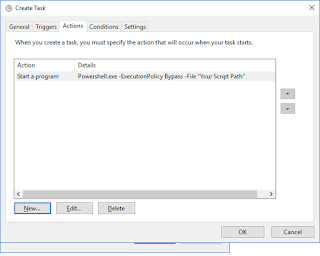
3.
Click
on the Actions tab and click on New.
Action: Start a program
Program/script: Powershell.exe
You don't need to put a path as it should already be on
your system.
4.
First
you need to set the ExecutionPolicy. You have two options here, you can set the
ExecutionPolicy on the machine or you can do it on a per-script basis.
To set the execution policy globally, you can issue this
command from within PowerShell:
Set-ExecutionPolicy Unrestricted
However, here we want to set the
execution policy on a per script basis and open up security for us to run the
script. This security policy will only be in effect for the script we are
running and not compromise security otherwise.
That means we use the following Argument:
-ExecutionPolicy Bypass -File “Your Script Path”


5. You can provide conditions and Settings if you need or any requirement.
6. Save and Test